Watch Certificate

Partner guide · Retailer

Activating a warranty

Selling a watch a manufacture entrusted to you? Activate its warranty in Watch Certificate™ at the time of sale: the warranty starts and your customer receives their watch's passport. This guide shows you every step. In the screenshots, orange frames show where to click or what to fill in.

How it works

  1. Find the watch: scan its warranty card or search its serial number.
  2. Check the start date, then activate.
  3. Hand the card to your customer.
  4. Notify the owner (optional): your customer receives an invitation by email.
  5. Track your sales in the Warranties space.

Good to know

You only see the watches in your stock: the ones the manufacture transferred to you. On the passport, they read Entrusted by followed by the manufacture's name. A watch is missing? Write to us from the Contact us link of the search.

The warranty's start date

By default, today. Set the date of the sale if it took place earlier, or the day the watch is handed over if that comes later, at the latest 3 months after the sale.

Part A

Activating the warranty at the sale

Step 1: click “Activate a warranty”
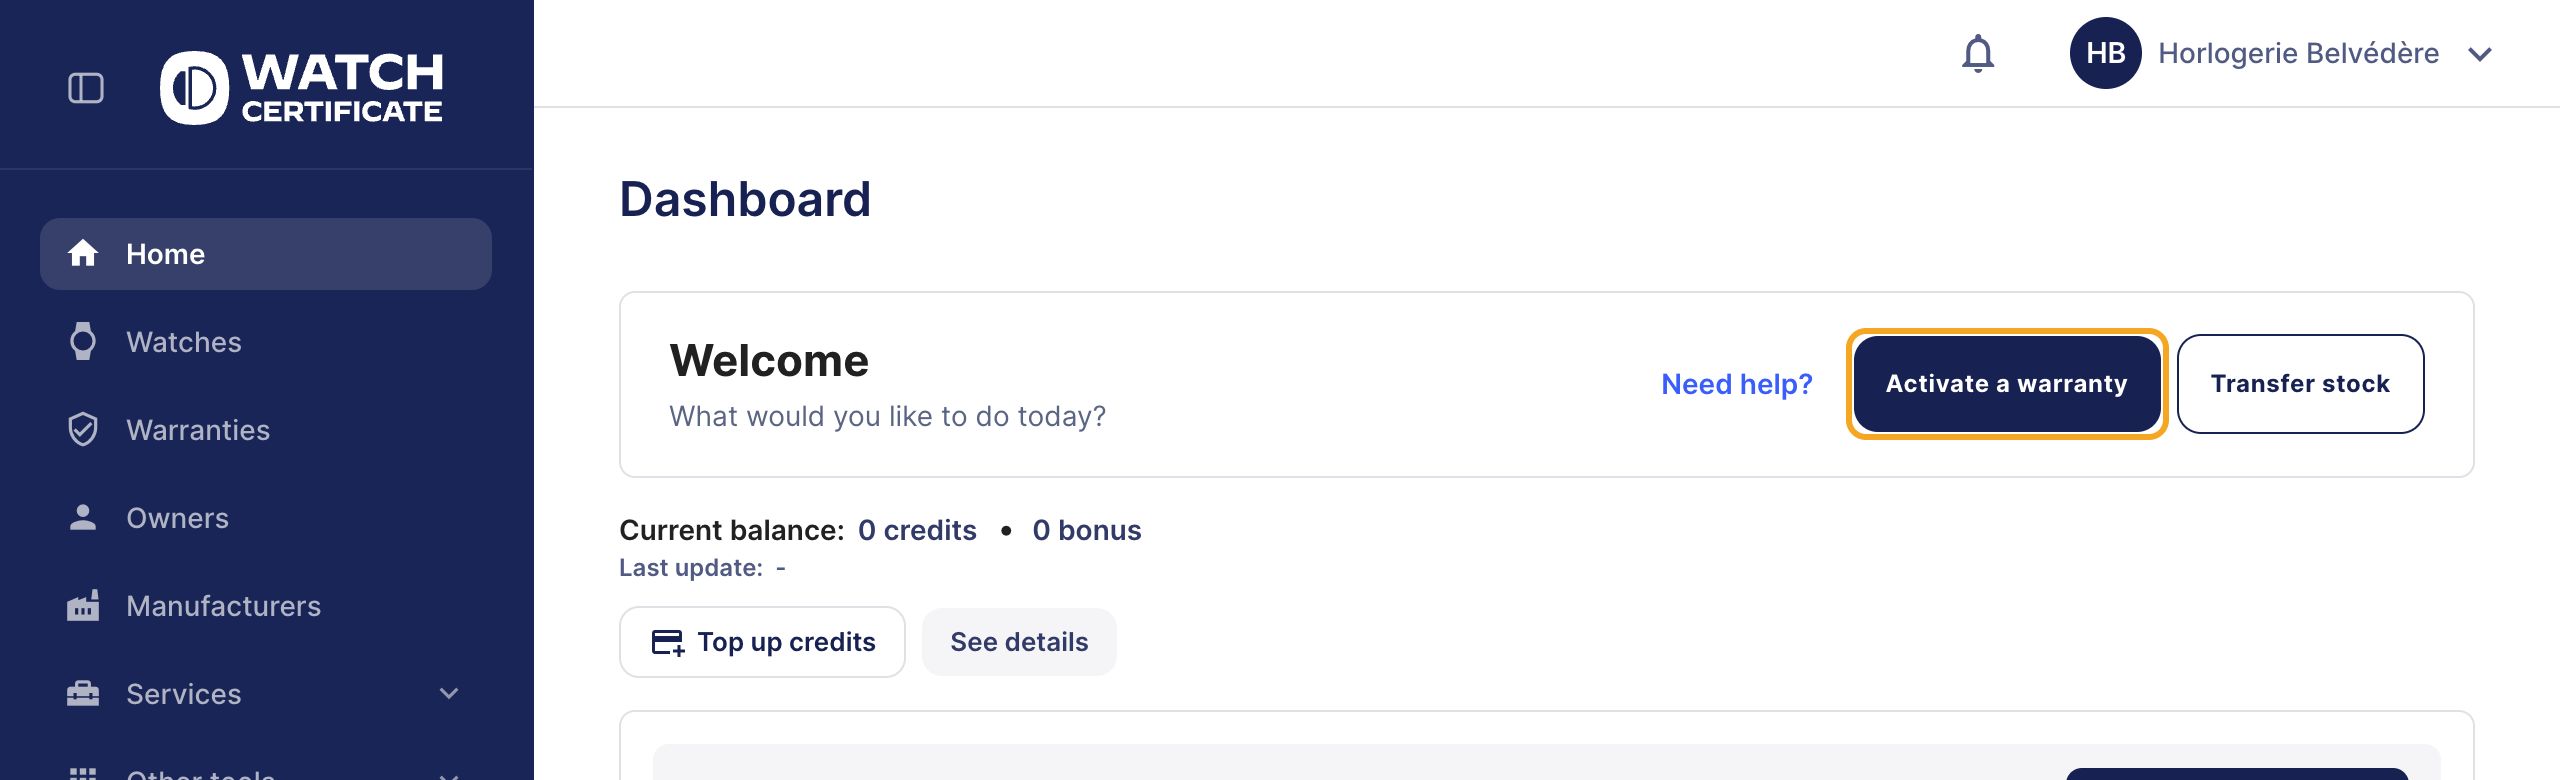
On the Home page, click Activate a warranty.

The Activate a warranty button on the dashboard.

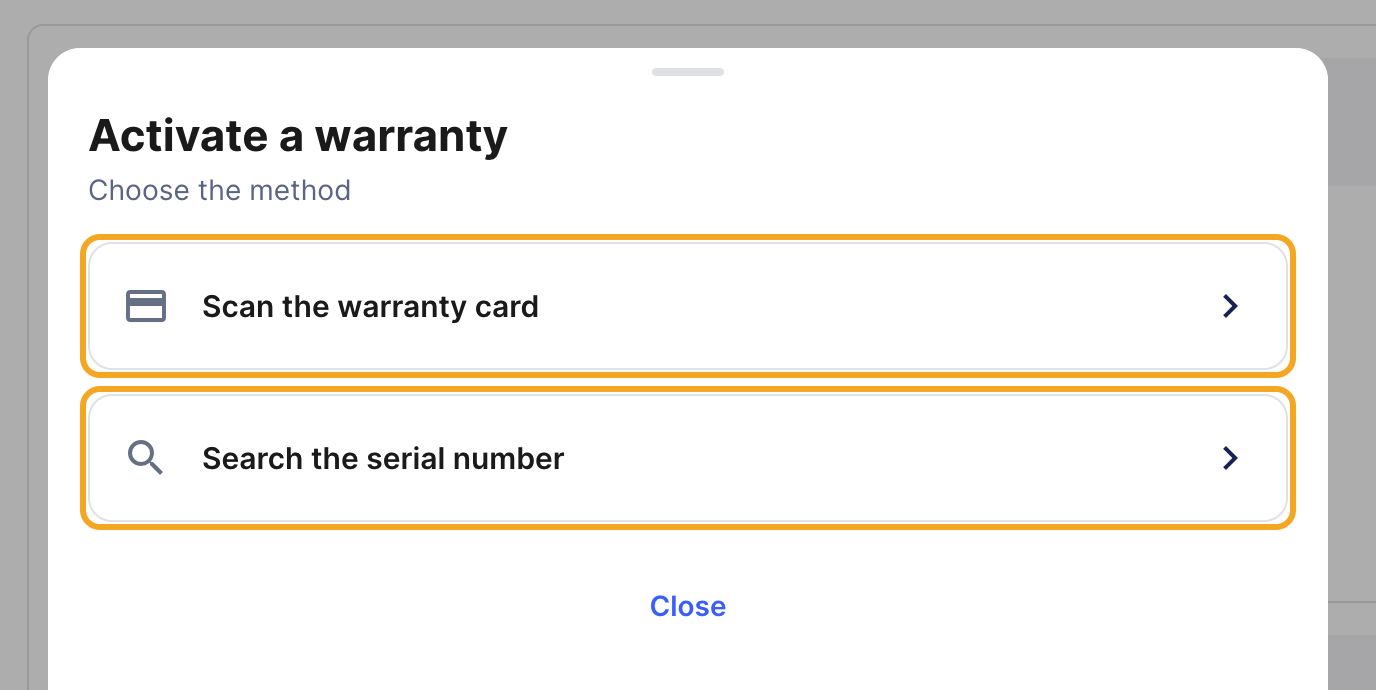
Step 2: choose the method

Scan the warranty card: with your phone, scan the QR code of the card that comes with the watch. Search the serial number: type the number engraved on the case.

The two ways to find the watch.

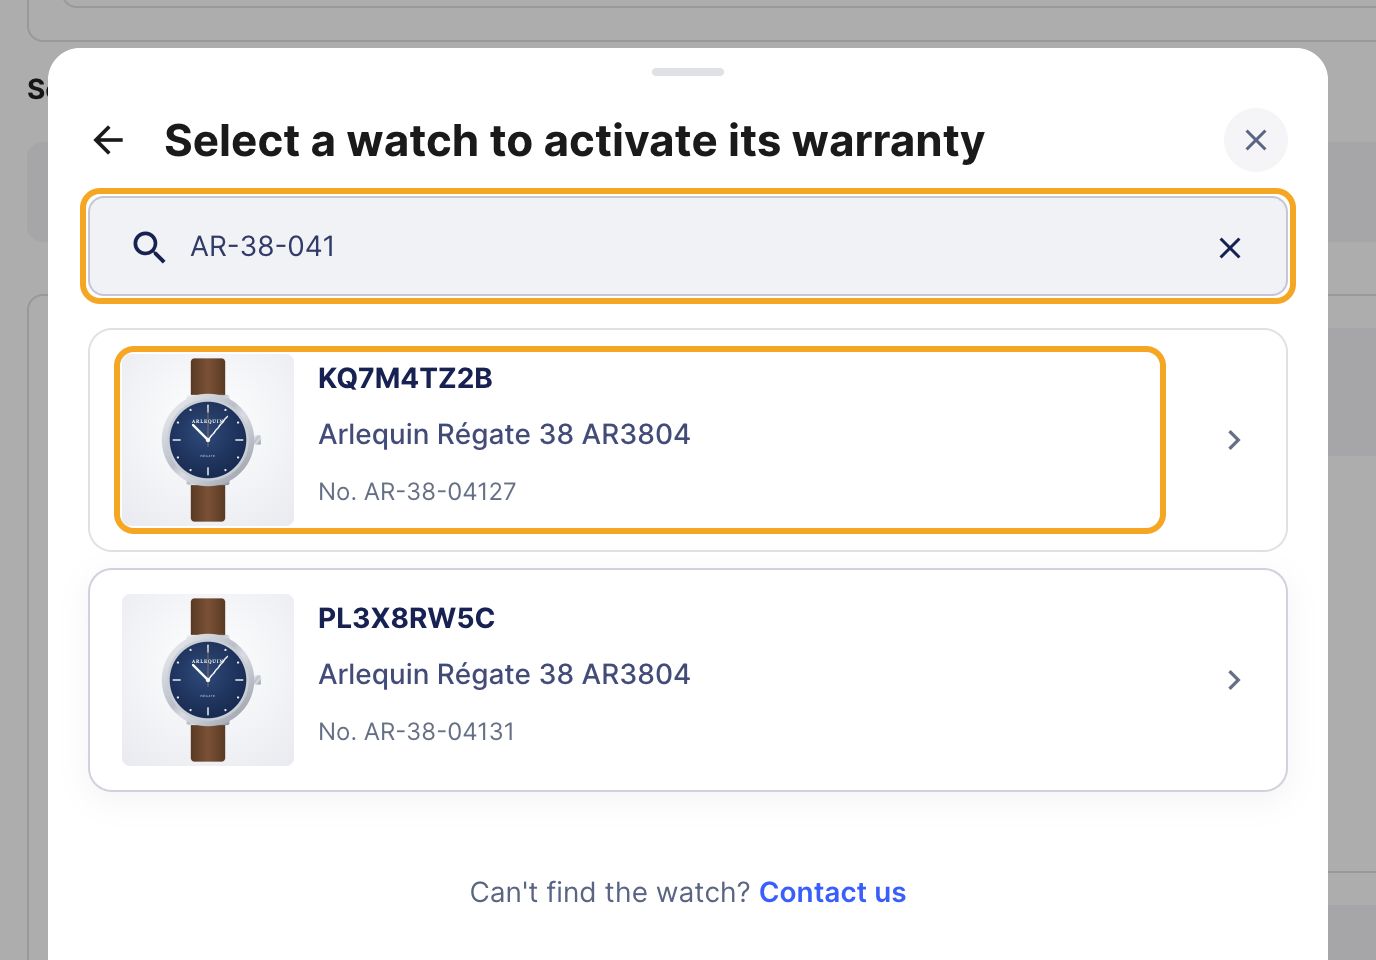
Step 3: select the watch

Type the beginning of the serial number. The list shows the watches in your stock that match. Click the right one: check the serial number (No.) and the model.

The serial number search and the watch to pick.

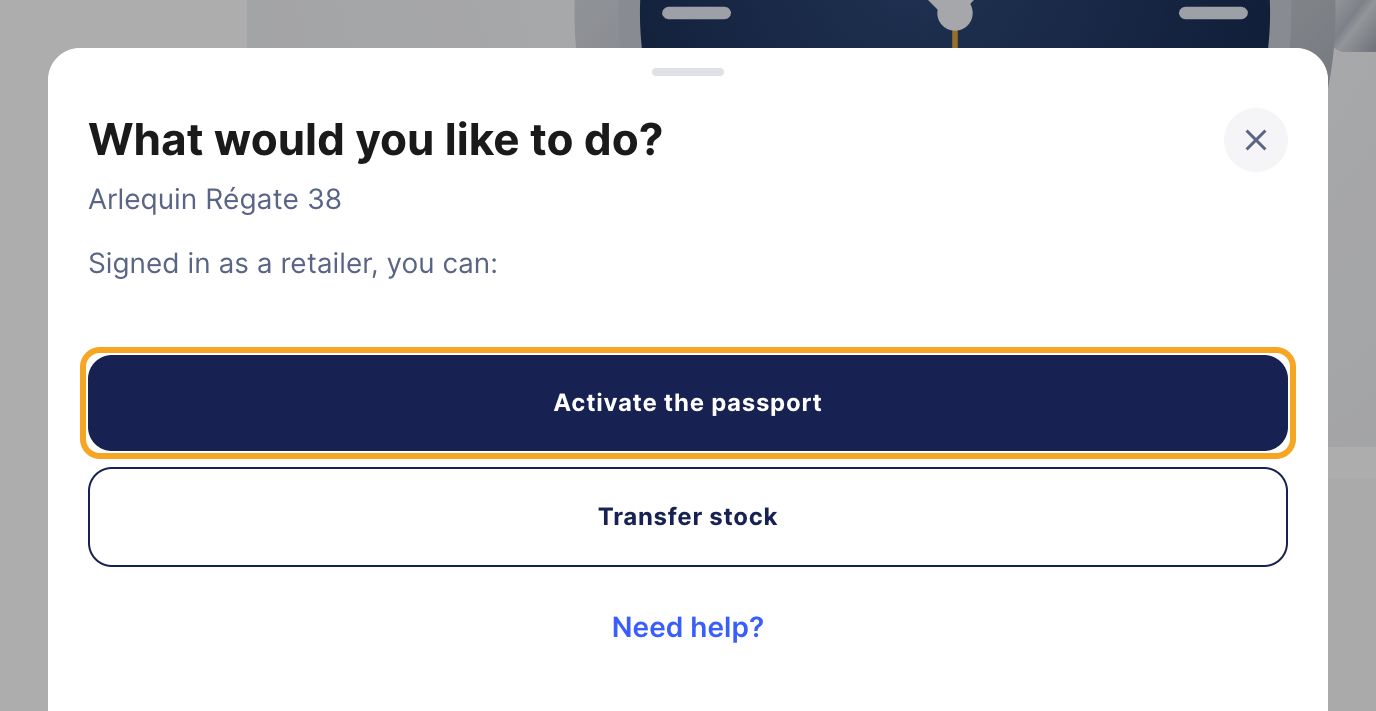
Tip: you scanned the card?

The watch's passport opens with the question What would you like to do?. Click Activate the passport.

After scanning the card: Activate the passport.

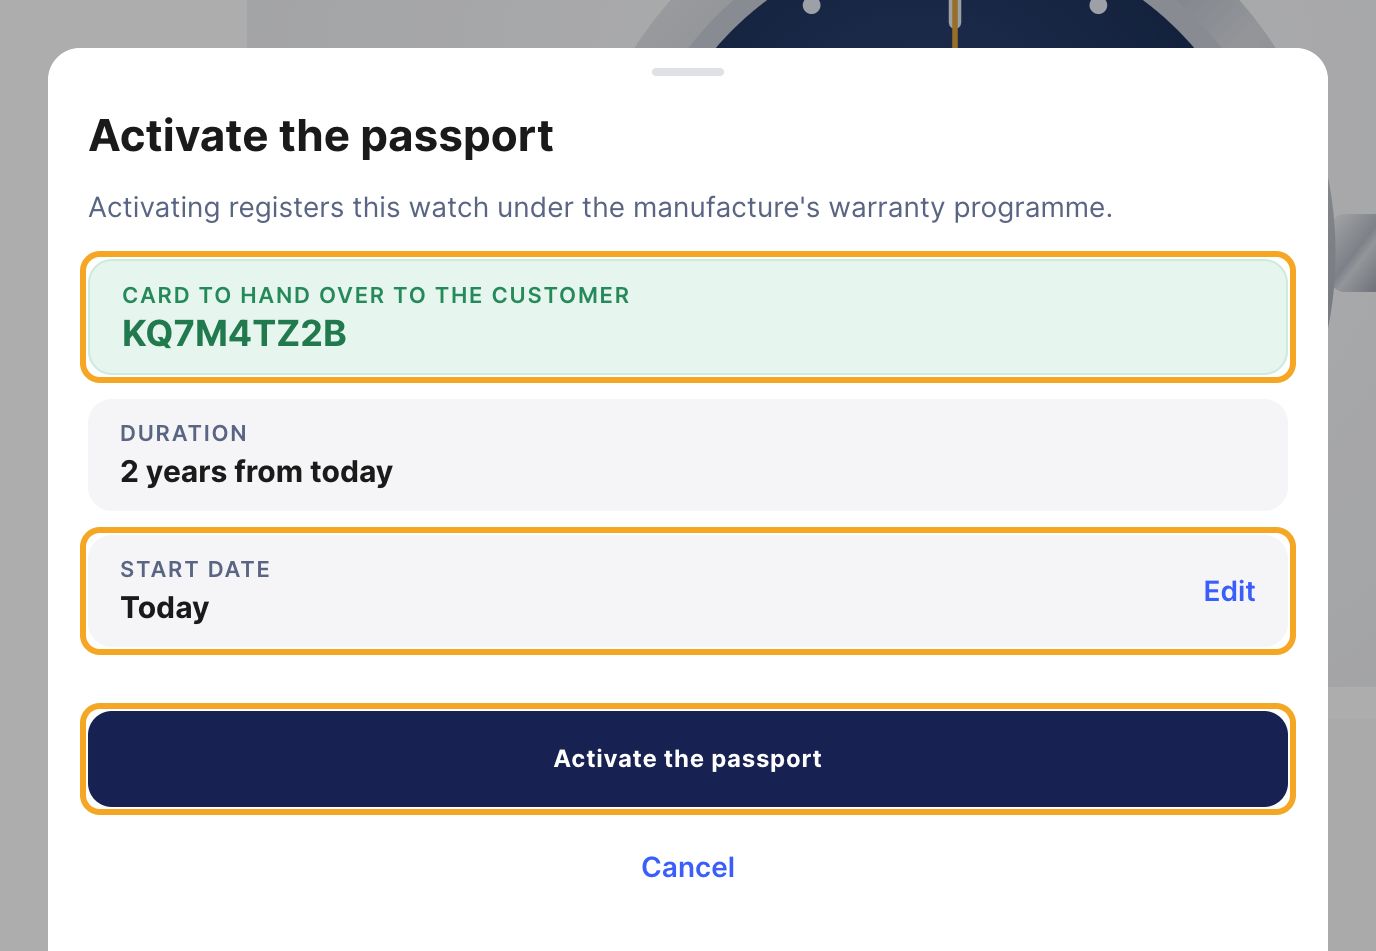
Step 4: check, then activate

The Activate the passport screen shows the number of the Card to hand over to the customer, the warranty's Duration and its Start date. If everything is right, click Activate the passport.

The card to hand over, the start date and the Activate the passport button.

Step 5 (if needed): change the start date
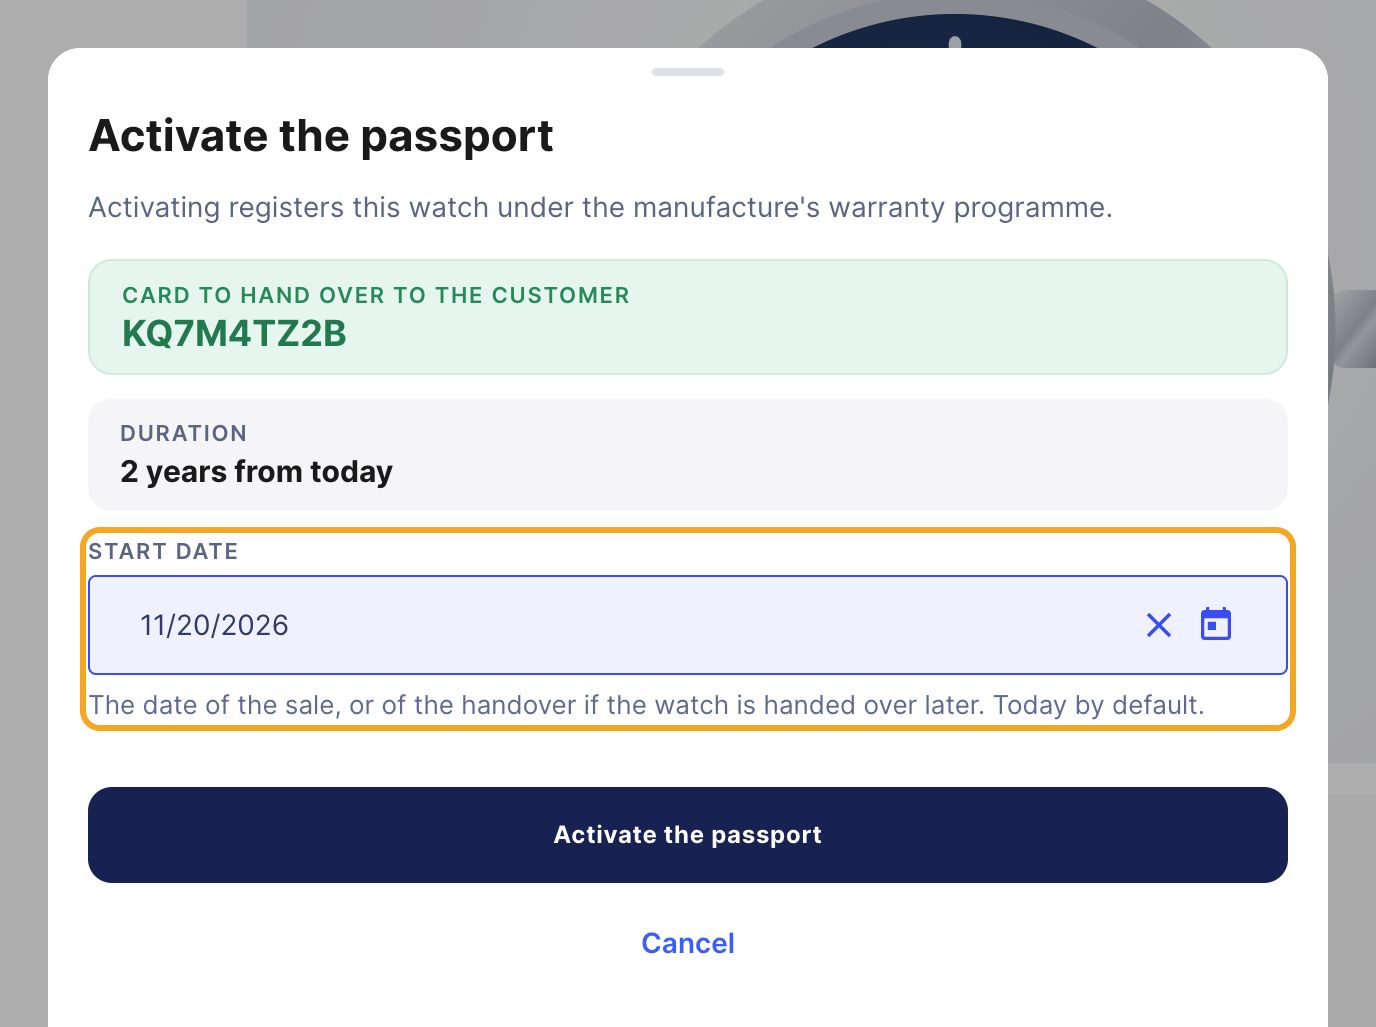
Click Edit next to Start date, then pick the date in the calendar. Then click Activate the passport.

The start date, picked in the calendar.

Step 6: hand the card to your customer
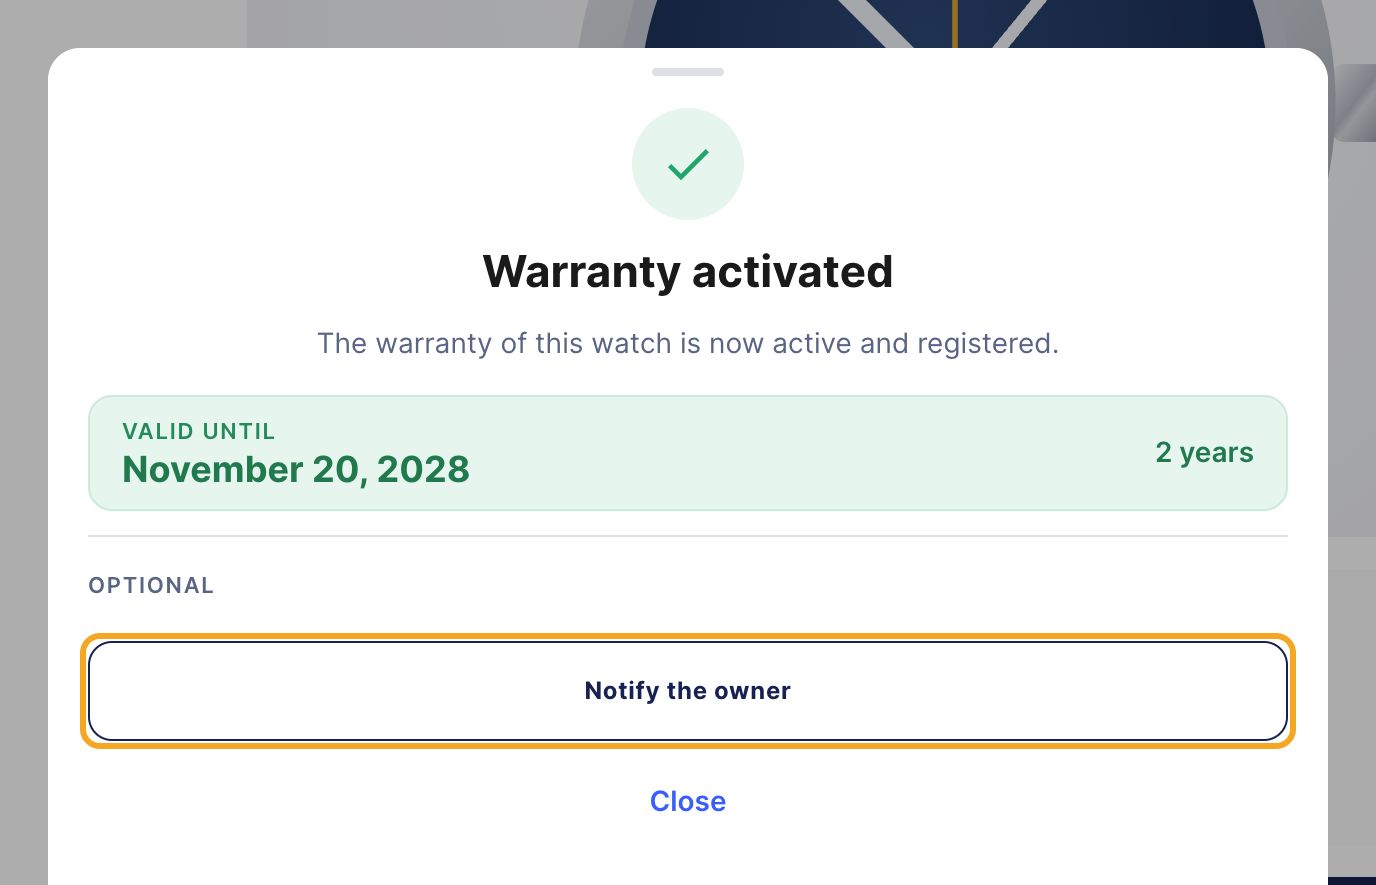
Warranty activated: the warranty runs from the start date, for the duration shown. Valid until gives the day it ends. Give the warranty card to your customer with the watch.

The warranty is activated. Notifying the owner is optional.

Part B

Your customer

Step 7: notify the owner
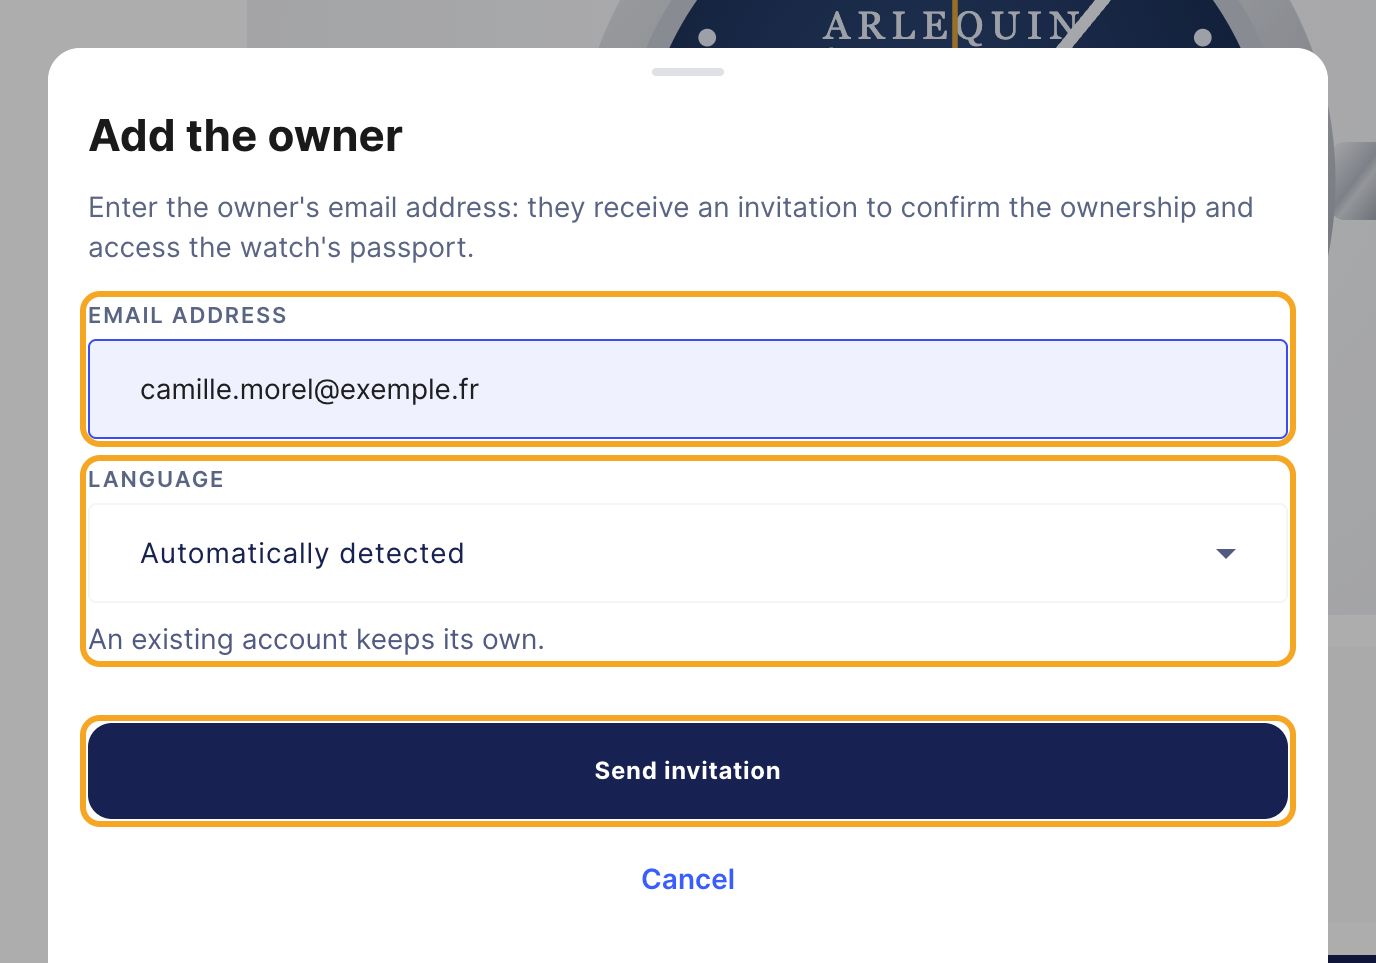
Click Notify the owner. Enter your customer's Email address. Choose the Language of their emails, or leave Automatically detected: a customer who already has an account keeps their own. Click Send invitation.

Add the owner: the customer's email, the language of their emails and sending the invitation.

What your customer receives

  • An email Confirm ownership of your watch, with a Confirm button.
  • Once they confirm, they reach their watch's passport and its warranty.
  • The link is valid for 7 days. Once expired, they get a new one in one click. If they do not confirm, a reminder goes out automatically.

Your customer has no account yet?

No problem: there is nothing to prepare. When they open the link in the email, they create their password and their Watch Certificate™ account is ready.

Step 8: check the invitation

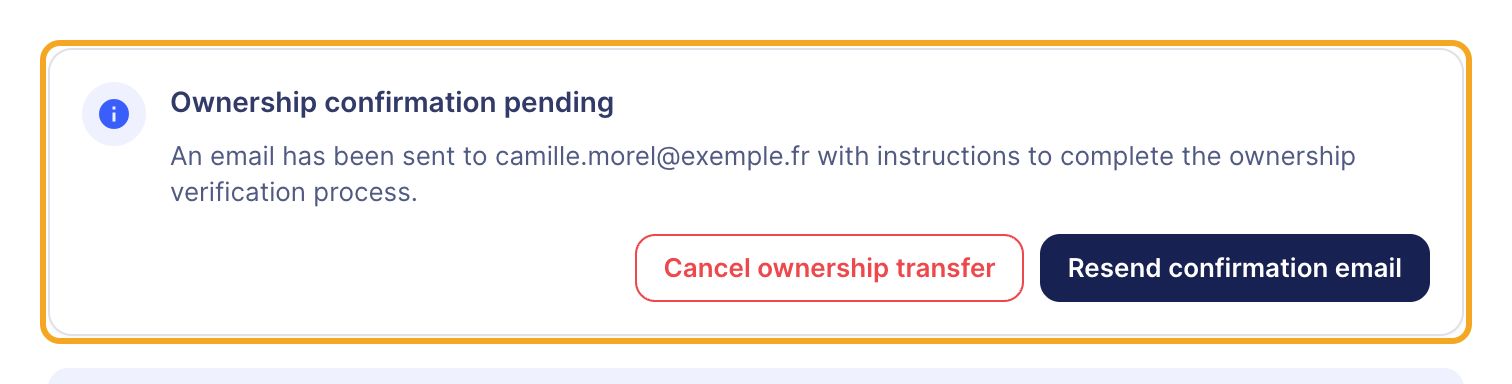
On the passport, the Ownership confirmation pending box shows the address used. Your customer received nothing? Click Resend confirmation email.

The invitation sent, awaiting confirmation.

Tip: the customer is not there to give their email?

Click Close after the activation. Later, open the passport: Notify the owner lets you send the invitation then.

Part C

Fixing a mistake

Wrong email address

As long as the customer has not confirmed, click Cancel ownership transfer in the Ownership confirmation pending box (step 8). Then add the right address.

Wrong start date

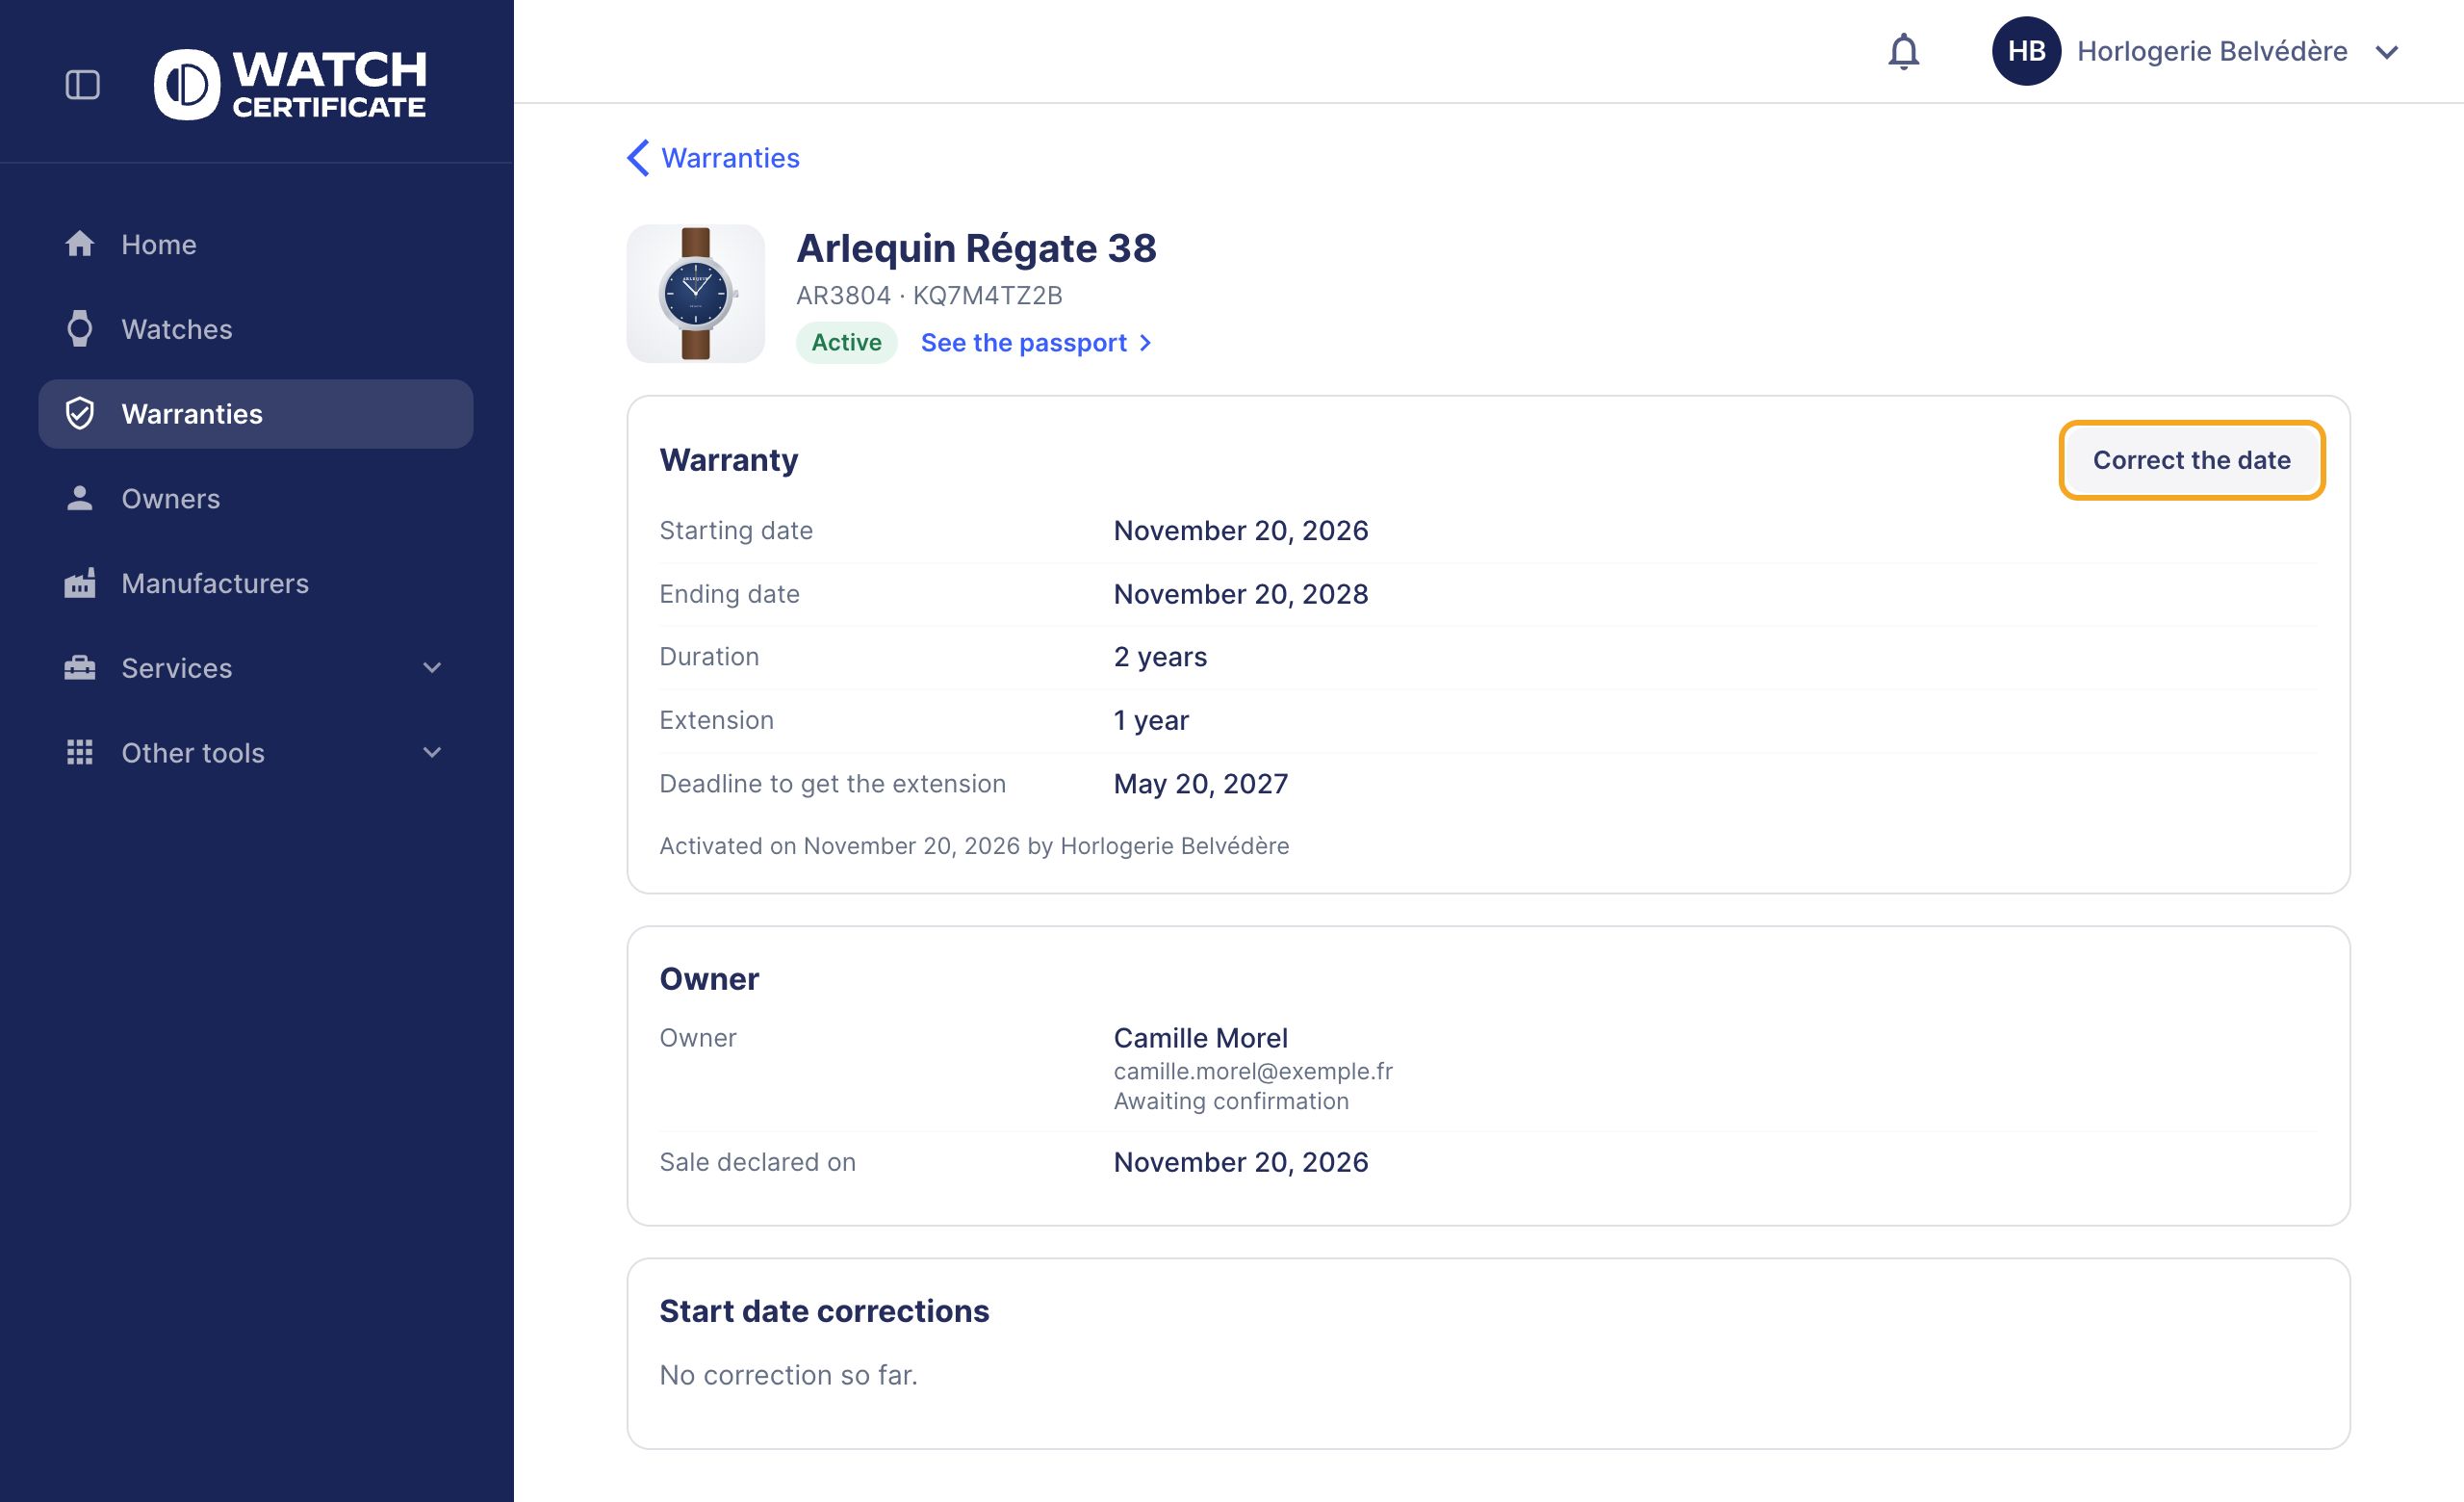
Open Warranties, then the watch. Click Correct the date. You can correct the date of a warranty you activated as long as the buyer has not confirmed the ownership. After that, ask the manufacture for the correction.

The warranty's page and the Correct the date button.

Wrong watch activated

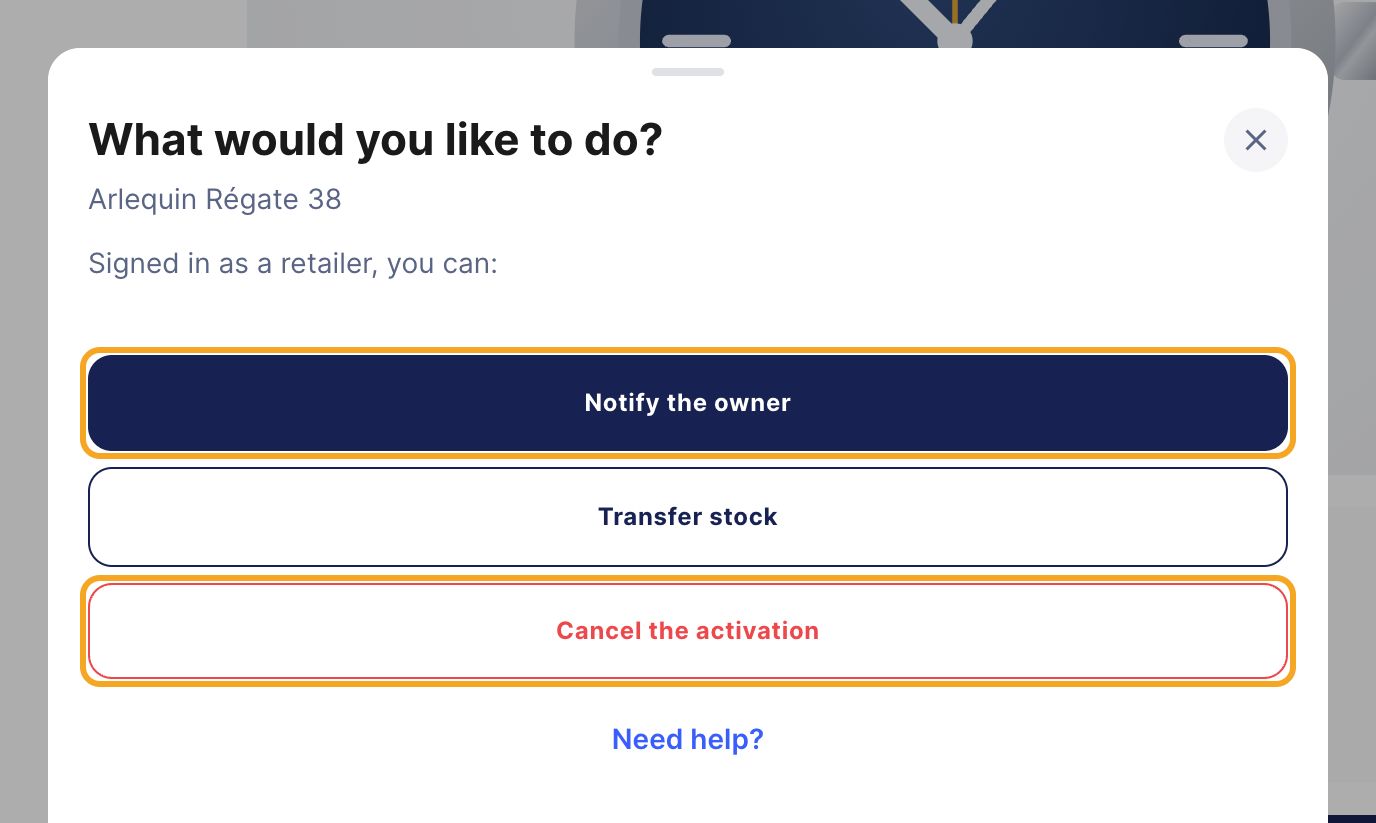
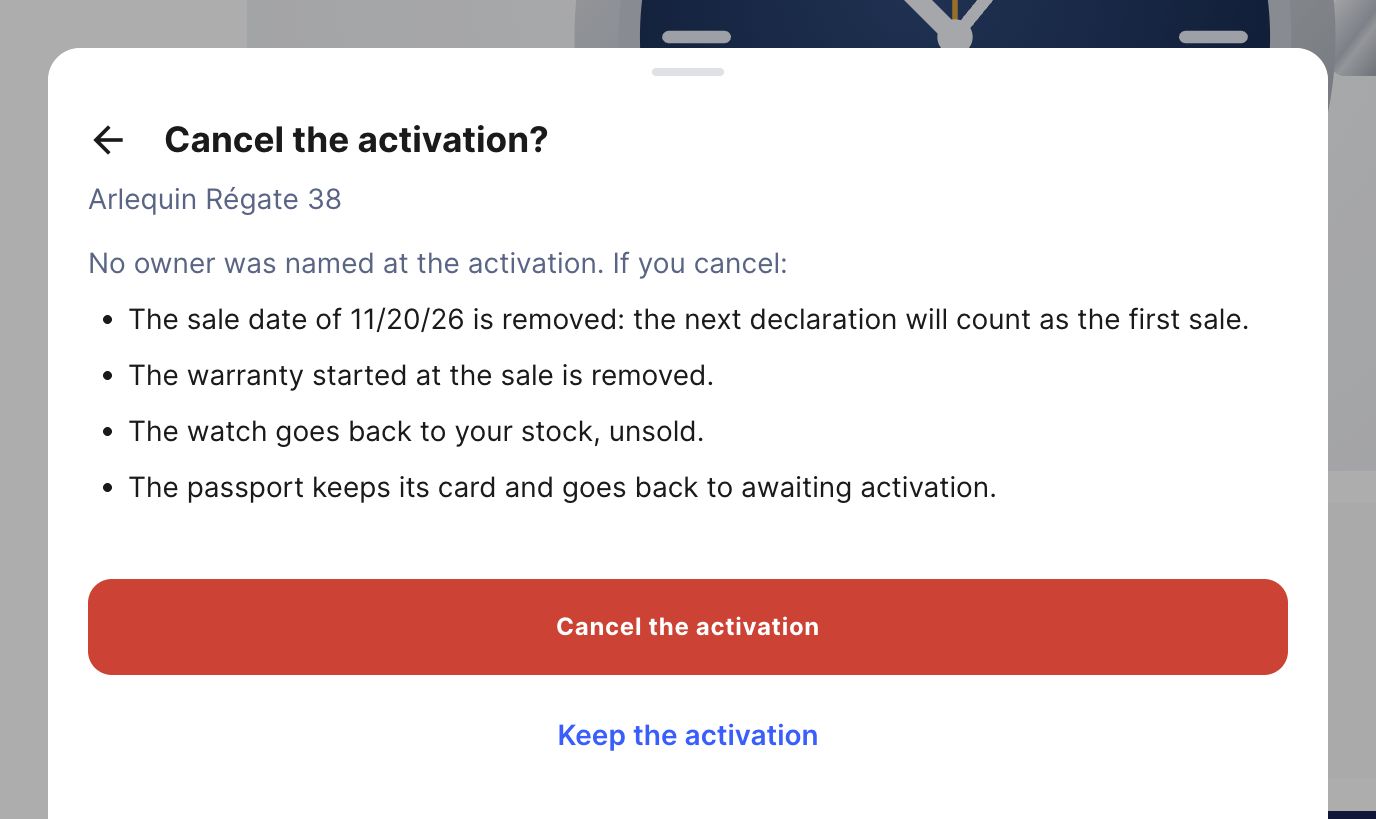
If you have not added an owner yet, open the watch's passport and click Cancel the activation. The screen details what happens: the sale date is cleared, the warranty is removed and the watch goes back to your stock, unsold. Confirm with Cancel the activation.

On a watch activated without an owner: Notify the owner, or Cancel the activation.
What cancelling changes, before you confirm.

Warning

Cancelling is only possible for a watch activated without an owner, and for 3 months after the sale. Beyond that, or if an owner was added, contact the Watch Certificate™ team.

Part D

Finding your warranties

The “Warranties” space
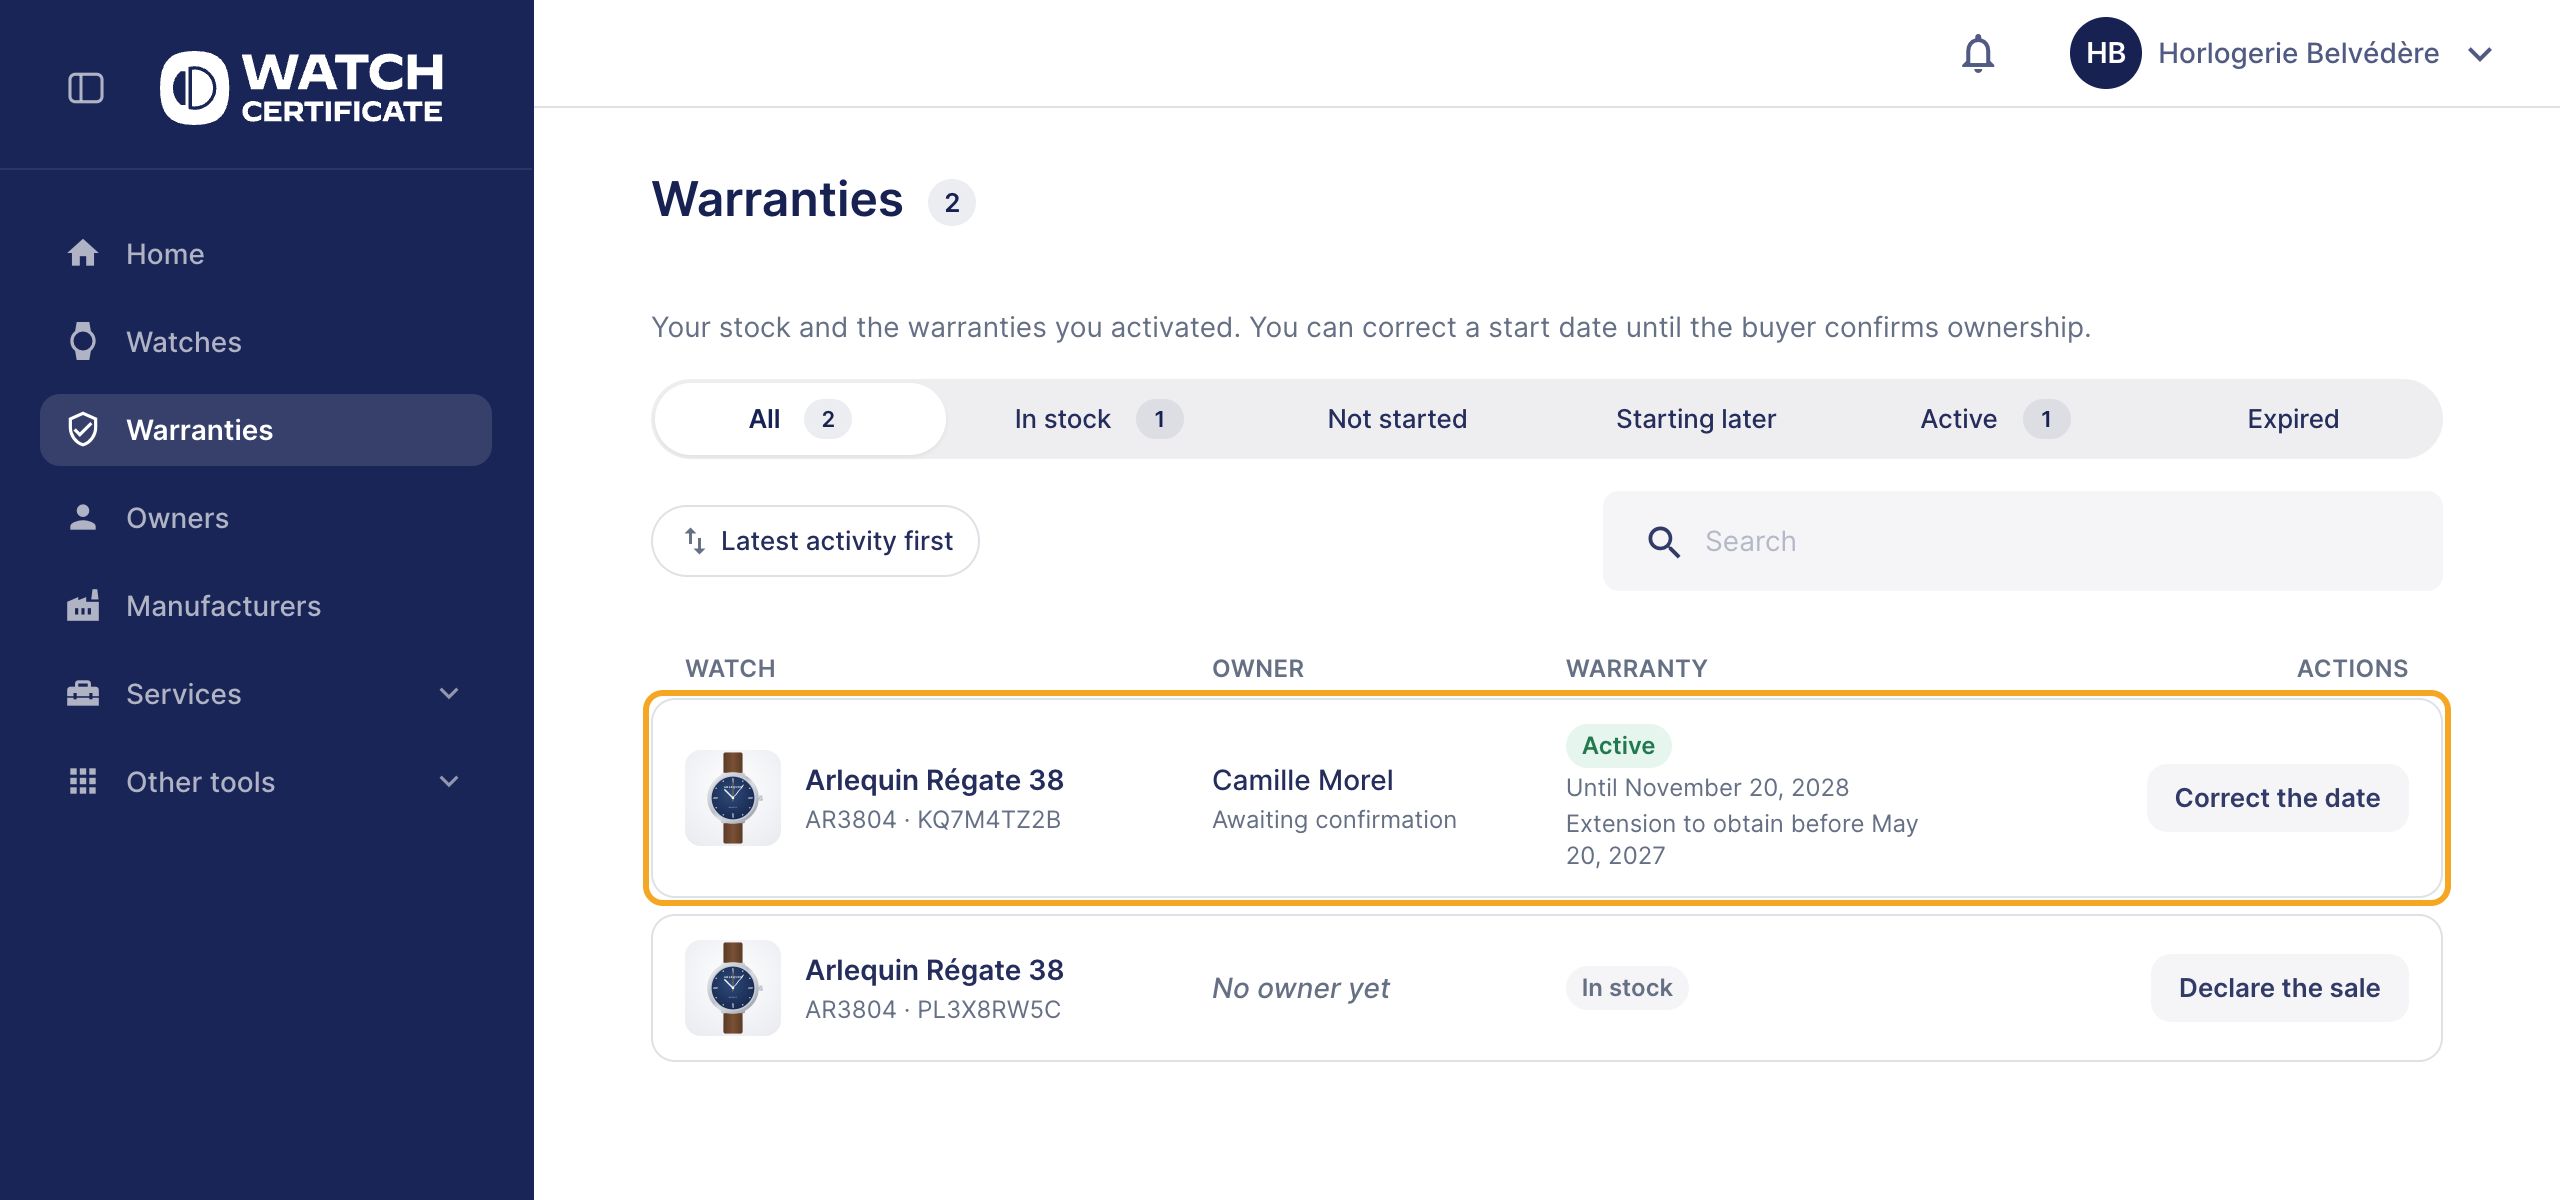
In the menu, click Warranties. You see your stock and the warranties you activated: the owner, the end date, the deadline to get the extension. The In stock, Active or Expired tabs filter the list. Declare the sale activates the warranty of a watch in your stock from this list.

An active warranty, awaiting the owner's confirmation, and a watch in stock.

Quick recap

  1. Home › Activate a warranty, then scan the card or search the serial number.
  2. Check the Start date (Edit if needed), then Activate the passport.
  3. Give the warranty card to your customer.
  4. Notify the owner: their email, then Send invitation.
  5. A mistake? Correct the date, Cancel ownership transfer or Cancel the activation.

Any question?

Click Need help? on your dashboard, or write to your Watch Certificate™ contact. We will get back to you quickly.